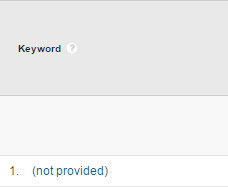
 Google has taken away quite a bit of data with (not provided).
You’re never going to get that back, which is a shame because that’s really useful early stage data. There’s certainly something to be said about knowing which organic terms are driving most of your visitors to the site, and then adjusting based on terms that are likely to convert.
Still, there’s a ton you can do with the data that’s available today. That is, there’s a lot you can dig through if you’re willing to work a little bit for the data:
- What are the sections of your site that are not getting indexed enough?
- What are the keywords people use to get to specific sections of the site?
You can answer those questions using Google Search Console, (formerly Webmaster Tools) but not if you use the default configuration. If you’re interested in configuring the tool to get more early stage data out of it, read on.
Getting Better Indexing Data
Why exactly do I need this?
If Google can’t see your page, your customers most likely can’t see your page. The default thing a lot of marketers do falls into one of two strategies:
- Ignore site maps. They don’t set up any sitemaps at all.
- Upload one sitemap, and let Google Search Console know. This is a lot better than ignoring sitemaps altogether, but knowing that 839 out of your 1,437 pages have been indexed isn’t very actionable.
So what do I need?
To get actionable data, you need to know which sections of the site get spidered by Google really well, and which ones get ignored for the most part. The idea is, the sections that don’t get crawled well need help – you need to provide better paths to the pages.
Got it. That does sound helpful. How do I get the data?
The trick is, you need to upload multiple sitemaps, one per key section of the web site.
Say your product section is under www.example.com/us/products/, your service section is under www.example.com/us/services/, and your “about the company” is under www.example.com/us/about-us/. Instead of uploading one sitemap for everything, you’re going to generate separate sitemaps for products, services, and about us.
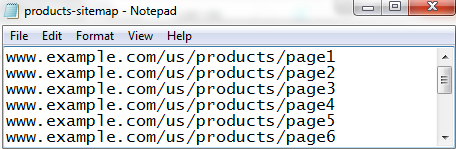
If you have a tool that can extract all the URLs of your site, all you need is Notepad. You can structure the products version of the sitemap like this:
www.example.com/us/products/page1
www.example.com/us/products/page2
…
www.example.com/us/products/page234
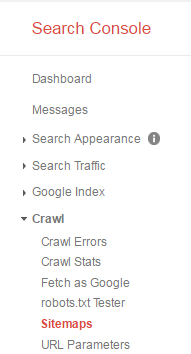
Then, you can name that Notepad file products-sitemap, upload it, and tell Google about the location under Crawl> Sitemaps.
You can repeat that process for services, about us, and any other section you need.
The key advantage of this approach is that for each sitemap, you can review submitted URLs versus Indexed URLs. If your products are getting indexed just fine, but your services need help, you’ll know you need to link to your services more.
Getting Better Keyword Data
What can I get out of Google Search Console?
What (not provided) took out is invaluable, but you can get parts of it back. Google Search Console can provide you with 3 months’ worth of search data.
To get the optimal view for keywords, you need to enable clicks, impressions, CTR, and position, then set the date to 90 days.

All right. But that gives me all the keywords for the entire site. What if I need just, say, keywords for just the blog section of the site?
Like with sitemaps, this is more useful if you can get data for a section of the web site rather than the entire site.
The trick is, you can have multiple Google Search Console properties to get section data.
Wait, what?
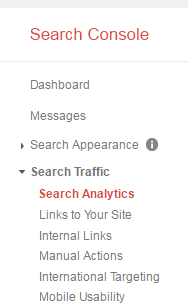
Yeah. At the root level of Google Search Console, you can create more properties by clicking on “add a property.” That doesn’t just apply to separate domains. That can be for the same web site.
In the case of SiteTuners, the keywords data for the blog will be under the property, https://sitetuners.com/blog/. The keywords will still be under GSC> Search Traffic> Search Analytics, but because the property has been created for just the blog section, only keywords leading to the blog will be visible.

You can apply that to the various sections of your site, and get keyword data for various sections of the site.
Good Data is Only for those Who Dig
Default use of Google Search Console is fine, but if you really want to get early stage keyword and indexing data, you need to take the time to set things up properly.
If you set up multiple properties to get keyword data for the different sections of your site, and upload multiple sitemaps to get indexing data, you’re likely to understand early stage wins better than the competition.